
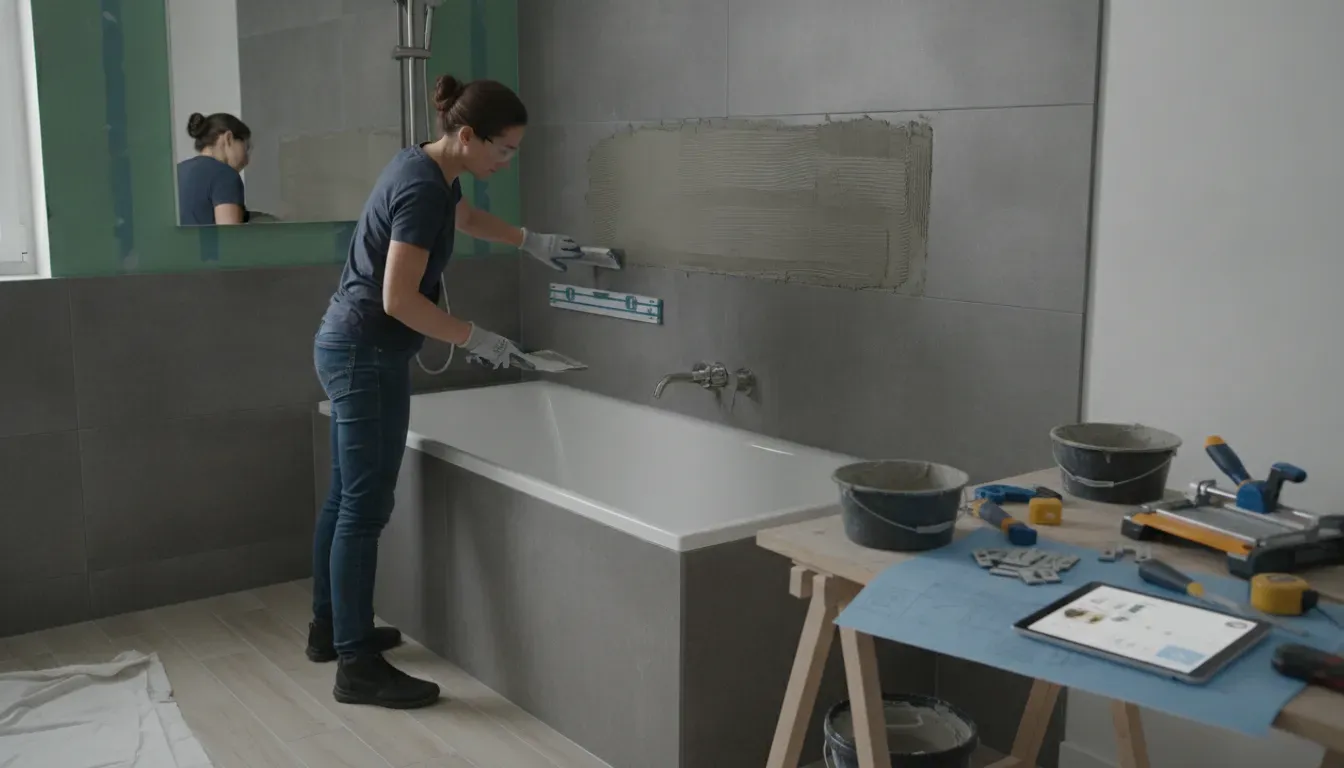
Tile Installation: A Beginner’s Step-by-Step Guide
A tile project can look straightforward until you reach an uneven wall, a difficult corner, a plumbing opening, or a countertop transition. These details determine whether the finished surface looks polished or patched together. Good tile installation combines design planning with careful preparation and precise workmanship. Before you begin, consider the room’s moisture levels, traffic, substrate, tile material, grout width, maintenance needs, and access during the rest of the remodel. This guide explains what to buy, how to prepare and set tile, how long each stage may take, and when a professional remodeling team can help bring the project together.
Key Takeaways
- Match tile to the space: Consider moisture, traffic, slip resistance, maintenance, tile size, and substrate conditions before choosing ceramic, porcelain, stone, glass, mosaic, or vinyl.
- Plan every detail before setting tile: Prepare and waterproof the surface, dry-lay the pattern, order extra material, inspect tile lots, and coordinate cuts and transitions with cabinets, countertops, fixtures, and flooring.
- Follow each installation stage carefully: Use compatible mortar, tools, grout, and sealers; check coverage and alignment as you work; allow proper curing time; and hire a professional for showers, large-format tile, complex patterns, or major surface repairs.
Which Tile Should You Choose?
The best tile for your project depends on more than color and pattern. Consider where it will be installed, how much moisture and foot traffic it will handle, how flat the surface is, and how much maintenance you are willing to manage. A kitchen backsplash, shower wall, kitchen floor, and bathroom floor each have different requirements.
Start by choosing a material that suits the room, then compare its size, texture, installation method, and care requirements. If you are remodeling several parts of your kitchen, coordinate the tile with your cabinets and countertops before ordering materials. This helps create a cohesive design and prevents surprises around cabinet edges, appliances, outlets, and countertop heights.
Compare ceramic, porcelain, natural stone, glass, and mosaic tile
Ceramic tile is made from clay, sand, and water, then shaped, glazed, and fired. It is slightly softer and more porous than porcelain, which makes it easier to cut and install. Ceramic is often a practical choice for backsplashes, walls, and low-traffic areas. Its broad selection of colors, shapes, and patterns also makes it useful for decorative features. Review this ceramic and porcelain tile comparison before choosing between the two.
Porcelain is denser and absorbs less moisture, making it a strong option for floors, bathrooms, entryways, and other high-use spaces. Natural stone, including marble, slate, and travertine, adds distinct color and texture, but it may require sealing and specialized cleaning. Glass tile is commonly used on walls and backsplashes. Mosaic describes the format rather than one specific material, so mosaics can contain ceramic, porcelain, glass, or stone pieces.
Review vinyl and peel-and-stick installation needs
Vinyl tile can work well for certain floors when you want a lightweight material and a simpler installation process. Peel-and-stick products may suit a small update or a temporary design change, but they still require careful preparation. The adhesive cannot compensate for a dirty, damp, rough, or uneven surface.
Before installation, clean the substrate and remove dust, grease, loose material, raised seams, and old adhesive. Uneven areas may show through the vinyl or keep the tile from bonding correctly. Follow the product instructions for room temperature, acclimation, adhesive coverage, and rolling the finished floor. Peel-and-stick tile is generally not the best choice for areas with standing water, repeated moisture, or poor drainage. For a long-lasting result, confirm that the product is approved for the room and substrate.
Match tile to the room, substrate, traffic, and moisture
Choose tile according to the conditions of the room. Ceramic tile is often well suited to kitchen backsplashes, bathroom walls, and decorative features in dry areas. Porcelain is usually a better fit for high-traffic floors or rooms exposed to frequent moisture because its low absorption rate helps it resist water. Its wear resistance also makes it useful in busy parts of the home.
The substrate matters just as much as the tile. A wall, wood subfloor, concrete slab, and shower surround may each need different preparation materials. Tile requires a firm, stable, and appropriately flat surface, so do not assume it can be installed over every existing finish. Check the instructions for the tile and setting material, then address movement, moisture, and uneven areas before installation. Kitchens Today can help coordinate tile with cabinets, countertops, and other finishes through its kitchen remodeling services.
Check porosity, slip resistance, size, maintenance, and waste
Porosity describes how much moisture a tile can absorb. Dense porcelain generally resists water and wear well, while natural stone may need a sealer and gentler cleaning products. For floors, choose a surface with suitable slip resistance, especially in bathrooms, laundry rooms, entryways, and other spaces where water may collect. Ask the tile supplier for the product’s technical specifications instead of judging safety by appearance alone.
Tile size affects both the finished look and the installation process. Large-format tile can make a room feel more open, but it requires a flatter substrate and careful handling. Small tiles and mosaics can follow curves and add visual detail, although their extra grout lines may require more cleaning. Measure the space carefully and order additional tile for cuts, breakage, and future repairs. Intricate patterns and diagonal layouts usually create more waste, so include that material in your estimate before placing the order.
Inspect tile lots, blend boxes, and acclimation instructions
Tile color, texture, and finish can vary slightly between production runs. When possible, purchase boxes from the same lot and check the labels before installation. If the design includes intentional variation, open several boxes and blend pieces from them as you work. This creates a more balanced appearance and prevents large patches of one shade from appearing across the finished surface.
Inspect each piece for cracks, chips, warping, and printing inconsistencies before setting it. Set damaged tile aside rather than assuming grout will hide the problem. Some tile, vinyl products, and setting materials also need time to acclimate to the room’s temperature and humidity. Follow the manufacturer’s instructions for storage, conditioning, and handling. Keep boxes flat when directed, protect materials from moisture, and confirm that the mortar, adhesive, grout, and sealer are compatible with the chosen tile.
Which Tools and Materials Do You Need?
The right tools and materials help you create cleaner cuts, level surfaces, consistent grout joints, and a longer-lasting installation. Before you begin, identify the tile type, installation area, substrate, and moisture conditions. A kitchen backsplash, bathroom floor, and shower wall each require different products and preparation methods.
Make a complete supply list before mixing mortar. Missing essentials, such as the correct trowel or a diamond hole saw, can delay the project or lead to poor results. Always follow the instructions for your specific tile, mortar, grout, backer board, and waterproofing products. Daltile’s floor tile installation guide recommends starting with a surface that is clean, smooth, dry, and free of residue.
Gather measuring, leveling, layout, and safety tools
Start with a tape measure, pencil, chalk line, framing square, straightedge, and level. A laser level can help you establish accurate reference lines across a long wall or floor. Keep a calculator nearby to estimate tile quantities, grout coverage, and mortar needs.
Safety equipment is equally important. Wear safety glasses when cutting tile, hearing protection when using a wet saw, and gloves when handling sharp edges. Knee pads make floor work more comfortable, while a suitable dust mask helps limit exposure during dry cutting or surface preparation.
Protect nearby surfaces with plastic sheeting, painter’s tape, and drop cloths. If tile installation is part of a larger renovation, coordinate the work with your kitchen remodeling project to protect cabinets, countertops, and flooring.
Choose manual cutters, wet saws, nippers, and hole saws
A manual tile cutter works well for many straight cuts in ceramic and some porcelain tile. Thick porcelain, natural stone, diagonal cuts, and large projects may require a wet saw with the appropriate diamond blade. Tile nippers can handle small adjustments and curved edges, but practice on scrap pieces first to reduce chipping.
Use a diamond hole saw for openings around plumbing, faucets, and electrical outlets. An angle grinder with a diamond blade may help with detailed cuts, but it requires careful handling and appropriate protection. Mark each cut clearly, support the tile, and avoid forcing the blade.
Test every cutting method on an unused tile before working on a visible piece. This lets you confirm the blade, pressure, and cut location. Keep spare blades available, and remember that polished or patterned tile may show small chips more clearly than plain tile.
Select mortar, adhesive, trowels, mixing tools, spacers, and leveling systems
Choose thin-set mortar or tile adhesive according to the tile, substrate, room conditions, and product instructions. A shower wall, bathroom floor, and backsplash may need different setting materials. You will also need a clean mixing bucket, margin trowel, mixing paddle, and drill when mechanical mixing is permitted.
Use the specified water ratio and allow the product to rest for the recommended time. Do not add water after mortar starts to set. Select a notched trowel that suits the tile size and surface. Its ridges create consistent coverage, while the flat side helps work mortar into the substrate.
Tile spacers maintain even grout joints, and a leveling system can reduce height differences between large-format tiles. Lift an occasional tile to check coverage. If the back is not adequately covered, adjust the trowel size or spreading method before continuing.
Add backer board, underlayment, primer, waterproofing, and edge profiles
Tile requires a stable, compatible surface. Depending on the project, you may need cement backer board, an uncoupling underlayment, or another approved tile substrate. Use the recommended fasteners, seam treatment, and installation process for the product you select.
A primer may be necessary before applying mortar over a smooth, porous, or specially treated surface. Read the manufacturer’s instructions rather than assuming every substrate requires the same preparation.
Wet areas need a continuous waterproofing system beneath or behind the tile. Gather the appropriate membrane, sealant, reinforcing fabric, and corner treatments for seams, pipe penetrations, and fasteners. Tile and grout alone do not prevent water from reaching the structure.
For exposed edges, choose a matching trim profile, bullnose tile, or another approved finish. Edge profiles protect corners and create clean transitions beside cabinets, countertops, doorways, and flooring. When planning a kitchen update, coordinate those transitions with your countertop materials by reviewing Kitchens Today’s kitchen countertop options.
Prepare grout, caulk, sealer, sponges, buckets, and cleanup supplies
Select grout based on the joint width, tile type, and room conditions. Sanded grout is often used for wider joints, while unsanded grout may suit narrow joints or tiles that scratch easily. Epoxy grout provides strong stain resistance but requires careful application and prompt cleanup. Confirm compatibility before using grout with glass, natural stone, or textured tile.
You will also need flexible caulk for inside corners, changes of plane, and joints where tile meets another material. Use sealer only when the grout or stone manufacturer recommends it, and wait for the required cure time.
For cleanup, prepare clean buckets, sponges, microfiber cloths, a grout float, soft brushes, and a pH-neutral cleaner. Change rinse water often, and remove mortar or grout from tile faces before it hardens. Keeping these supplies ready helps protect the tile and maintain clean, even joints.
How Do You Prepare the Surface?
A durable tile installation starts beneath the tile. Even well-made tile can crack, loosen, or develop uneven grout lines when the surface underneath is weak, damp, dirty, or out of level. Before mixing mortar, prepare a stable base that suits the room, tile, and setting materials.
Preparation depends on the location. A kitchen backsplash may need a sound, clean wall, while a bathroom floor or shower requires careful attention to waterproofing and movement. If tile installation is part of a larger kitchen renovation, coordinate the work with your kitchen remodeling plan. Cabinet heights, countertop thickness, appliances, and flooring transitions all affect the finished tile surface.
If you discover structural damage, persistent moisture, or an uneven floor that requires extensive correction, professional help may save time and prevent costly repairs. A qualified installer can identify problems before they become hidden behind the finished tile.
Remove existing finishes and protect the work area
Remove old tile, carpet, vinyl, adhesive, baseboards, and other finishes that could interfere with the new installation. Scrape away stubborn residue carefully, taking care not to damage the subfloor or wallboard beneath it. Remove cabinet doors, furniture, appliances, trim, and fixtures when possible, then cover anything that remains with plastic sheeting.
Tile removal creates sharp debris and fine dust. Wear eye protection, work gloves, sturdy shoes, and a properly fitted dust mask. Seal nearby doorways and use a shop vacuum as you work. Before fastening anything to a wall, identify the location of plumbing, electrical lines, and other hidden services. Protect adjacent cabinets and countertops, particularly during a kitchen renovation. Kitchens Today offers custom cabinets and storage solutions, so careful protection helps prevent damage to finished surfaces during tile preparation.
Check the substrate for flatness, strength, deflection, and moisture
Inspect the exposed surface from several angles. Place a long level or straightedge across the floor or wall to find dips, ridges, and sudden changes in height. The substrate should be firm, securely attached, and free from movement. A floor that flexes underfoot can transfer stress to tile and grout, even if the surface appears level.
Look for swelling, soft spots, cracks, mold, water stains, and loose fasteners. In kitchens and bathrooms, investigate moisture problems before covering the area. Concrete should be free of curing compounds, grease, and other substances that could prevent adhesion. Wood substrates should be structurally sound and suitable for the planned tile installation. The Tile Council of North America provides industry guidance on tile assemblies and substrate requirements, but always follow the instructions for the specific tile, mortar, adhesive, and underlayment you purchase.
Repair, level, and reinforce damaged or uneven areas
Do not use mortar to hide major problems in a subfloor or wall. Replace swollen wood, secure loose panels, and repair damaged concrete before setting tile. Small low areas may require a compatible patching compound or self-leveling underlayment. Follow the product instructions for primer, application thickness, drying time, and approved substrates.
If the floor has excessive movement, identify the structural cause before continuing. Additional fasteners, framing repairs, or a properly installed underlayment may be necessary. Large-format tile requires especially careful surface preparation because its broad surface does not follow minor dips as easily as smaller tile. Check the flatness requirements for your tile before applying any leveling product.
Let every repair material cure fully before applying mortar or adhesive. Rushing this step can trap moisture, weaken the bond, or cause the new tile to shift. If the required repairs involve framing, water damage, or a major slope, consider hiring a remodeling professional.
Clean, dry, and prime the surface as needed
After completing repairs, remove dust, dirt, grease, wax, paint flakes, and loose material. Vacuum the surface thoroughly, then use a cleaner compatible with the substrate and installation product. Avoid leaving behind a soapy film, which can interfere with adhesion. Let the surface dry completely, especially around sinks, dishwashers, exterior walls, and other areas exposed to moisture.
Some surfaces require primer before applying patching compound, self-leveling underlayment, mortar, or adhesive. Use only the primer specified for that product and substrate. A primer designed for concrete may not be suitable for plywood or painted drywall. Do not guess when product compatibility is unclear. Review the manufacturer’s instructions, such as Daltile’s tile installation guidance, before proceeding.
A clean surface does not always mean a perfectly smooth surface. Some mortars and adhesives need a properly prepared textured surface for mechanical bonding. Follow the installation product directions instead of sanding or sealing automatically.
Install backer board and waterproofing in wet areas
Tile resists water, but the layers behind it still need protection. In bathrooms, shower surrounds, laundry areas, and other wet locations, install an approved backer board or waterproofing system according to the manufacturer’s instructions. Cement board is water-resistant, but it is not automatically a complete waterproofing system. Seal seams, fastener penetrations, corners, and transitions with the system’s approved materials.
A shower usually needs a continuous waterproofing assembly that directs water toward the drain. Do not rely on grout or caulk as the primary water barrier. Keep fasteners flush without breaking the board, and avoid placing them where plumbing may be hidden. Follow the product’s requirements for overlap, sealing, and curing time.
If the waterproofing details are unclear, hire a qualified tile professional before covering the area. Fixing a concealed leak later can require removing finished tile, cabinets, or countertops. Proper preparation is especially important when new tile meets countertop materials in a kitchen or bathroom.
Plan movement joints, transitions, and changes of plane
Tile assemblies need room to accommodate normal movement. Leave the required perimeter gap at walls, cabinets, posts, and other fixed surfaces, then cover it with trim or flexible sealant. Do not fill these spaces with rigid grout. Larger floors, control joints, and areas where different materials meet may need additional movement joints.
Use flexible caulk at inside corners and where a wall meets a floor instead of forcing grout into a change of plane. Plan transitions to adjacent flooring before setting the first tile so the finished surfaces meet cleanly and safely. Check the height of nearby flooring, thresholds, cabinet bases, and doors before choosing the tile and underlayment assembly.
Review the tile and mortar manufacturer’s instructions for joint requirements. For more detailed technical guidance, consult the ANSI tile installation standards through the Tile Council of North America. Planning these details before installation helps prevent cracked grout, sharp height differences, and unfinished-looking edges.
How Do You Plan the Tile Layout?
A well-planned tile layout creates straight lines, balanced cuts, and a polished finished surface. Before mixing mortar or adhesive, map the room and decide where full tiles, cut pieces, grout joints, and transitions will go. This step matters especially in kitchens and bathrooms, where cabinets, plumbing, appliances, outlets, and doorways can interrupt the pattern.
If tile installation is part of a larger renovation, coordinate the layout with your kitchen cabinets, countertops, flooring, and storage features before work begins. The installation order can affect finished heights, appliance clearances, and transitions between materials.
Measure the space and calculate tile quantities
Measure the length and width of the installation area, then multiply those measurements to estimate the square footage. For an irregular room, divide the space into smaller rectangles and add the totals together. Measure alcoves, closets, niches, and other sections separately so you do not overlook them.
Tile sizes are not always exact, and grout joints affect how many pieces fit in each row. Record the actual tile dimensions instead of relying only on the size printed on the box. Also review the manufacturer’s installation instructions before finalizing your estimate.
Daltile’s floor tile installation guide recommends finding the center points of opposite walls and snapping chalk lines between them. These lines give you a reliable starting point, even when the walls are slightly uneven or out of square.
Add tile for cuts, breakage, and future repairs
Order more tile than the measured square footage requires. Extra material accounts for cuts, damaged pieces, mistakes, and variations in the room’s dimensions. It also gives you matching replacement pieces if a tile cracks or becomes damaged later.
The amount of extra tile depends on the room’s shape, the installation pattern, tile size, and number of obstacles. A simple layout may create little waste, while diagonal patterns, mosaics, and rooms with many corners typically require more. Ask your tile supplier or installer how much overage suits your project.
Keep unopened boxes in a dry storage area after the installation. Save the product name, color, size, and lot information with them. When planning wall cuts, avoid narrow strips that look unbalanced or are difficult to install. Daltile recommends shifting the center line when necessary so cuts are not smaller than half a tile.
Establish straight reference lines instead of relying on walls
Walls and cabinets can look straight while still being slightly out of square. If you use them as your guide, those small differences may become more noticeable with every row. Instead, mark reference lines across the room and use them to control the position of the first tiles.
Find the center points of opposing walls, then snap chalk lines between them. Use a framing square, tape measure, or laser level to confirm that the lines meet at a true right angle. If they are not square, adjust the layout before spreading any setting material.
For large-format tile, a laser level or long straightedge can make this process easier. The goal is to create a dependable grid that guides the installation, even when the room itself is not perfectly symmetrical. Recheck the lines as you work, particularly after moving tools or materials across the surface.
Dry-lay tile to test patterns, spacing, and alignment
A dry layout lets you test the design before the tile becomes permanent. Place several rows in both directions, including the spacers you plan to use. This shows how grout joints affect the finished dimensions and helps identify awkward cuts near walls, cabinets, doorways, and fixtures.
Dry-laying also gives you a chance to compare pattern options. Try a straight-set arrangement, staggered rows, or a directional layout if the tile design allows it. For rectangular porcelain tile, check the manufacturer’s instructions before using a running-bond pattern. Some products limit the offset to one-third of the tile length to help reduce lippage.
Take photos of the arrangement if you need to move the tile before installation. You can also mark important reference points on the floor or wall so you can recreate the layout accurately. This preparation is especially useful when several tile sizes or decorative pieces are part of the design.
Center the layout and avoid narrow sliver cuts
A centered layout usually looks more intentional than one that begins with a full tile at one wall and ends with a thin strip at the opposite wall. After marking your reference lines, calculate the width of the tiles and grout joints that will fit on each side. If one edge would receive a very narrow cut, shift the starting line to create wider, more balanced pieces.
This does not always mean placing a full tile at the room’s exact center. The best starting point depends on the room’s focal areas. In a kitchen, you may want the pattern to align with the center of a sink, island, range, or prominent cabinet run. In a bathroom, the doorway or most visible wall may matter more than the room’s mathematical center.
Check the layout from normal viewing positions before committing to it. A small adjustment can make the finished installation look much more polished and prevent difficult cuts along prominent edges.
Plan around cabinets, fixtures, outlets, corners, and doorways
Mark every feature that will interrupt the tile, including cabinets, islands, vanities, toilets, sinks, outlets, vents, corners, and door casings. Plan cuts around these features before spreading mortar. Whenever possible, place full tiles in the most visible areas and use cut pieces beneath cabinets or behind appliances.
Door jambs can often be undercut so the tile slides beneath them, creating a cleaner transition than cutting around the casing. For outlets and plumbing penetrations, measure from two fixed reference points and transfer those measurements to the tile. Make each opening large enough for the fixture trim, but avoid leaving an excessive gap.
Coordinate the tile plan with the overall kitchen remodeling process, especially when cabinets and countertops are being replaced. Confirm finished heights and appliance clearances before setting tile.
Set grout-joint width and installation order
Choose the grout-joint width before finalizing the layout. Follow the tile manufacturer’s recommendations because edge finish, size variation, and pattern requirements can affect the appropriate spacing. Use consistent spacers, including during the dry layout, so your measurements reflect the finished installation.
Decide where installation will begin and how you will maintain access through the room. Many floor layouts start at a prominent reference line and work toward the far wall, leaving perimeter cuts for later. Wall tile may require a temporary ledger board so the first visible row stays level.
For large-format rectangular tile, do not assume that a standard half-tile running bond is acceptable. Manufacturer instructions may call for a wider joint or a smaller offset. Following those instructions helps reduce uneven edges and keeps the pattern within the tile’s installation requirements.
Inspect and blend tiles from multiple boxes
Before setting tile, open several boxes and compare the pieces. Look for shade changes, surface variation, warping, printed patterns, and differences in edge finish. Natural stone and many ceramic products have intentional variation, so one box may not represent the appearance of the entire order.
Blend tiles from multiple boxes as you work instead of using one box at a time. This distributes color and pattern changes throughout the installation rather than creating visible blocks of different shades. Keep tiles from the same color lot together when possible, and follow any acclimation instructions on the packaging.
During the dry layout, rotate pieces and arrange prominent veining or repeated patterns deliberately. Set aside chipped or damaged tiles for cuts. A final inspection at this stage is much easier than removing a tile after the mortar has cured.
How Do You Cut and Set Tile?
Cutting and setting tile takes more than making each piece fit. The layout, cutting method, mortar coverage, and tile alignment all affect the finished surface. Small mistakes become especially noticeable around cabinets, countertops, plumbing fixtures, outlets, corners, and doorways, so work carefully and check each step before moving on.
Start with a clean, flat, dry, and properly prepared substrate. Keep your layout plan nearby, and organize your tools before mixing mortar or adhesive. In a kitchen, tile installation should also coordinate with cabinet heights, countertop edges, appliances, and flooring transitions. A detailed kitchen remodeling plan helps keep those elements working together.
Use the setting material recommended for your tile, substrate, and installation area. A product suitable for a backsplash may not be appropriate for a floor, shower, large-format tile, or natural stone. Read the product instructions before mixing, and follow the specified water ratio, working time, and curing requirements.
As you work, protect nearby cabinets, countertops, and finished surfaces. Apply mortar in small sections, inspect coverage regularly, and clean the tile faces and joints before material hardens. Patience at this stage helps create a flatter, cleaner installation and reduces the need for repairs later.
Measure twice and mark the finished side
Measure the installation area and the tile before making any cut. Walls and corners may not be perfectly square, so avoid assuming that two spaces with similar dimensions need identical pieces. Label each cut tile with its location to prevent mix-ups during installation.
Mark the cut on the finished side when the tool and tile manufacturer recommend it. Use a pencil or suitable marker that is visible but easy to remove. Account for grout joints, movement gaps, trim, cabinets, and walls. If the tile has a pattern or veining, check how the design will meet adjacent pieces. Daltile’s installation guidance also emphasizes careful measuring and planning before setting tile.
Practice on scrap tile before making final cuts
If you are using a manual cutter, wet saw, nippers, or hole saw for the first time, practice on a spare piece of the same tile. You will learn how much pressure the tool requires and see how the material behaves near edges, corners, and openings. Practice also gives you time to check the blade or scoring wheel.
Use scrap tile to test plumbing cuts and notches. Mark the shape, remove material in small stages, and compare the opening with the pipe or fixture as you work. Practice is particularly helpful with glass, porcelain, natural stone, and large-format tile. Wear eye protection, keep hands clear of cutting surfaces, and follow the tool manufacturer’s safety instructions.
Match the cutter to straight, curved, and plumbing cuts
Choose the cutting tool based on the tile’s material, thickness, and shape. A manual tile cutter works well for many straight cuts. A wet saw may be better for thick porcelain, natural stone, diagonal cuts, and projects that require cleaner edges. Tile nippers can shape small curves, but remove material gradually to reduce chipping.
For pipes and fixtures, use a hole saw rated for the tile or create a series of small relief cuts before refining the opening. Whenever possible, position the finished edge beneath an escutcheon, trim piece, or fixture. Review the tile manufacturer’s installation instructions before choosing a cutting method, especially for specialty materials.
Mix mortar or adhesive according to product directions
Select mortar or adhesive that matches the tile, substrate, and location. The correct product depends on whether you are installing a backsplash, floor, shower, natural stone, or large-format tile. Read the label before mixing, including its instructions for water quantity, mixing time, slaking, and remixing.
Add the recommended water to the bucket first, then gradually mix in the powder. Do not add extra water simply to make the material easier to spread. Too much water can weaken the bond or change how the product cures. Mix only what you can use within its working time. If the product requirements are unclear, ask a tile supplier or remodeling professional before installation.
Spread only what you can cover before the material skins over
Spread mortar or adhesive over a manageable area rather than covering the entire room. The material can begin to skin over in warm, dry, or well-ventilated conditions. Once the surface loses its workable quality, the tile may not bond properly.
Follow the open time listed on the product packaging, and reduce the section size if necessary. If the ridges look dry, glossy, or crumbly, remove the material and apply fresh mortar. Do not add water to material that has started to set. Work carefully around doorways, appliances, and narrow areas so you can place the tile while the adhesive remains ready.
Key in and comb mortar with the correct trowel
Use the trowel size recommended for your tile and setting material. Begin by pressing a thin layer of mortar into the substrate with the flat side of the trowel. This process, known as keying in, fills minor surface variations and improves contact between the substrate and mortar.
Next, comb the mortar with the notched side of the trowel. Hold the trowel at a consistent angle so the ridges have a uniform height and direction. Straight, parallel ridges make it easier to collapse air pockets beneath the tile. Avoid creating swirls or random patterns, which can leave voids. Large or uneven tile may need a larger trowel and mortar applied to the tile back.
Back-butter large-format or uneven tile
Back-buttering means applying a thin layer of mortar to the back of the tile. This technique can help with large-format tile, textured backs, and materials that need more consistent contact. Use the flat side of the trowel to press mortar into the tile back rather than leaving tall ridges.
Back-buttering does not replace combing mortar onto the substrate. Apply the specified mortar layer to both surfaces, then place the tile while the material is fresh. Lift an occasional tile to inspect coverage, particularly in wet areas and on floors that will receive heavy use. The Tile Council of North America’s resources offer additional guidance on tile installation methods and performance requirements.
Press, space, and level tiles without dragging them
Set each tile into the mortar with a gentle pressing or short sliding motion that collapses the ridges beneath it. Avoid dragging the tile across a long section, because this can move mortar out of place and disturb the layout. For large pieces, use a slight back-and-forth motion while keeping the tile positioned over its intended location.
Place spacers as you work to maintain consistent grout joints. If you use a leveling system, install its clips and wedges according to the product instructions. Do not force a tile into position, and make adjustments while the mortar is workable. Check the tile face for mortar before moving to the next piece.
Check coverage, lippage, and grout-joint depth as you work
Periodically lift a newly placed tile to inspect mortar coverage on the tile and substrate. If large areas are bare, adjust the trowel size, spreading direction, or pressure used to set the tile. Wet areas and floors often require careful coverage, so follow the requirements for your selected tile and setting material.
Use a level or straightedge to check for lippage, which is the height difference between neighboring tiles. Keep grout joints open and consistent by removing mortar that squeezes into them. Check alignment from several directions, since a tile may appear straight on one side while drifting on another. Small corrections are much easier before the mortar cures.
Remove excess mortar from tile faces and joints immediately
Keep a damp sponge, clean water, and margin trowel nearby as you set tile. Wipe mortar from the tile face before it dries, and remove material that squeezes into the grout joints. Use the trowel edge or a joint-cleaning tool to clear buildup without shifting the tile.
Change the rinse water often so you do not spread a film across the surface. Avoid flooding the installation, since excess water can affect some setting materials and wash mortar from the joints. Dried mortar may require scraping or specialty cleaning, which can scratch tile or damage finished surfaces. Clean carefully around the cabinets, countertops, and other materials included in your kitchen remodeling project.
How Long Does Each Installation Stage Take?
Tile installation rarely finishes in a single day. The timeline depends on the room’s size, the tile material, the condition of the existing surface, the setting products, and the amount of work happening around the installation. A small backsplash may take a day or two, while a kitchen floor, bathroom, or shower can require several days once preparation and curing time are included.
Preparation often takes longer than expected. Removing old flooring, repairing an uneven substrate, installing backer board, and waterproofing a wet area all need to happen before tile setting begins. After the tile is placed, the mortar or adhesive must cure before grouting. Grout and caulk also need time to set before the room can handle regular use.
Plan around the product instructions instead of relying on a fixed schedule. Temperature, humidity, ventilation, tile size, and substrate porosity can all affect drying and curing. Daltile’s floor tile installation instructions offer useful guidance on working time, cure periods, and surface preparation, but the directions for your specific products should always take priority.
Estimate preparation, setting, grouting, and cleanup time
Surface preparation is often the most unpredictable part of the project. A clean, flat, sound substrate may take only a few hours to prepare. Damaged flooring, old adhesive, uneven walls, or moisture problems can add a full day or more. Do not rush this stage, since tile can reflect every dip, bump, and weak spot underneath it.
Setting tile may take one day for a small area and several days for a larger kitchen or bathroom. Allow the recommended cure time before grouting, often about 24 hours, unless the adhesive or mortar manufacturer specifies otherwise. Grouting and initial cleanup commonly take several hours, followed by additional curing time. Add time for detailed cuts around cabinets, plumbing, doorways, and outlets. A professional installation may also be scheduled around cabinet delivery, countertop templating, and other remodeling work.
Condition tile and setting materials as directed
Prepare tile and setting materials according to the manufacturer’s instructions. Some products need time in the installation area before work begins so they can adjust to the room’s temperature and humidity. Check the packaging for acclimation requirements, especially when using specialty tile, adhesives, underlayment, or natural stone.
Choose mortar or adhesive based on both the tile and substrate. A product suitable for a dry wall may not be appropriate for a shower or floor. Follow the specified water ratio and mixing process. If the directions call for slaking, let the mixture rest before remixing it.
Do not add water to material that has started to set. Although this may make the mixture feel workable again, it can weaken the bond. Mix smaller batches when necessary, particularly if you are working alone or installing tile in a warm, dry room.
Work in manageable sections before mortar skins over
Spread only as much mortar or adhesive as you can cover within its stated working time. As a general guide, Daltile recommends spreading an area that can receive tile within about 15 minutes. The exact time varies with the product, room conditions, substrate absorption, and the size of the tile.
Check the exposed material before setting each tile. If the mortar or adhesive begins to form a skin, do not place tile over it and assume the bond will hold. Scrape away the affected material, apply fresh product, and work in a smaller section.
Manageable sections also make it easier to maintain straight reference lines, consistent grout joints, and full coverage. Keep layout marks visible, and avoid spreading more material than you can reach without stepping on freshly set tile.
Account for temperature, humidity, ventilation, and room access
Room conditions affect how quickly mortar, adhesive, grout, and caulk set. High humidity can lengthen drying time, while heat, direct sunlight, or strong airflow may cause some materials to dry too quickly. Review the product instructions for acceptable temperature and humidity ranges before beginning the installation.
Plan room access before placing the first tile. Decide how you will enter and leave without crossing freshly installed areas. In a kitchen remodel, coordinate tile work with cabinet delivery, countertop templating, and appliance placement. If the project includes new kitchen countertops, confirm which surfaces need to be installed first.
Keep pets, children, and other workers away from the room while the tile sets. If the space is part of a larger renovation, let every contractor know which areas are unavailable and when they can safely be used.
Wait for the required cure time before grouting or walking on tile
Freshly set tile can shift under pressure even when the surface appears dry. Follow the mortar or adhesive instructions before walking on the tile or applying grout. Many installations require about 24 hours, but large-format tile, cool temperatures, high humidity, and nonporous surfaces may require more time.
Before grouting, check that each tile is stable and that the joints are free of excess mortar. If a tile moves when you press it, correct the problem before continuing. Grout may fill the joint, but it cannot repair a weak bond or stabilize a tile that was not properly set.
Use a visible barrier or close the door to prevent accidental foot traffic. If someone must enter the room, create a planned path that does not cross the installation. This simple step can prevent uneven tiles, shifted grout joints, and avoidable repairs.
Delay heavy use, appliance installation, and furniture placement
Light foot traffic may be acceptable after the initial cure period, but floors usually need more time before they can handle heavy use. Daltile recommends allowing about 72 hours before placing newly installed floor tile under heavy traffic. Always follow the instructions for your specific mortar, adhesive, grout, and tile.
Wait to move appliances, cabinets, furniture, and other heavy items until the installation has cured adequately. Do not drag these items across the surface. If an appliance must be returned, use a protective path and have enough help to lift or carefully position it without scraping the tile.
Delay sealers and polishes for the period specified by the product manufacturer. Some installations require several weeks before these products should be applied. Rushing this step can trap moisture or interfere with proper curing.
Protect finished tile during the rest of the remodel
Tile can still be damaged after installation if other remodeling work continues without proper protection. Once the surface is safe to cover, use clean, breathable protective material designed for flooring. Avoid placing tape directly on tile or grout unless the manufacturer approves it. Adhesive residue can stain some surfaces or pull out grout that has not fully cured.
Clean spills, mortar, adhesive, and grout residue promptly using the method recommended for the tile. Avoid abrasive tools and harsh chemicals that may scratch, etch, or discolor the finish. Natural stone often requires more specific care than glazed ceramic or porcelain.
If cabinets, countertops, trim, or appliances still need to be installed, tell each contractor that the tile is new. During a complete kitchen remodeling project, clear communication between installation teams helps protect the finished surface and keeps the remaining work on schedule.
How Do You Grout and Finish Tile?
Grout fills the joints between tiles and gives the installation a clean, finished appearance. It also helps keep dirt and moisture from collecting between tiles. The best results depend on careful preparation, the right grout, consistent application, and enough curing time.
Before you begin, read the instructions for your specific tile, grout, mortar, and sealer. Requirements can vary for porcelain, natural stone, glass, large-format tile, and wet areas. Daltile’s tile installation guidance offers additional information about grout application and cleanup.
Remove spacers and clean joints before grouting
Wait until the mortar or adhesive has cured for the time listed on the product label. Then remove every tile spacer and leveling clip from the joints. Leaving spacers in place can create shallow areas, discoloration, or weak spots in the finished grout.
Remove dried mortar from the joints with a grout saw, utility knife, or another tool approved for your tile. Work slowly to avoid chipping tile edges or disturbing the bond beneath the tile. Vacuum or wipe away dust, then check that each joint has a consistent depth. Clean, open joints give the grout enough space to bond and help create more even lines.
Choose sanded, unsanded, epoxy, or specialty grout
Choose grout according to the joint width, tile material, location, and maintenance needs. Sanded grout is commonly used for wider joints because the aggregate helps limit shrinkage. Unsanded grout is often suitable for narrow joints and delicate surfaces that could scratch easily.
Epoxy grout resists stains and moisture, which makes it useful in busy kitchens and other areas exposed to spills. However, it can be more difficult to spread and clean. Specialty grout may be needed for glass tile, natural stone, outdoor installations, or very narrow joints. Always review the manufacturer’s recommendations before buying grout. For marble or other porous stone, confirm that the product will not scratch or discolor the surface.
Mix small batches with consistent water ratios
Prepare grout in small batches that you can apply and clean within its working time. Mixing too much at once can lead to waste if the material begins to stiffen before you finish the area. Use the water-to-powder ratio listed by the manufacturer instead of estimating the amount by sight.
Measure each batch consistently. Excess water can weaken grout, cause uneven color, and increase shrinkage. Too little water can make the grout difficult to pack into the joints. After mixing, let the grout rest for the recommended period, then remix it without adding more water. This process, often called slaking, helps create a smoother and more consistent mixture.
Pack joints diagonally with a rubber float
Spread grout across the tile with a clean rubber float held at approximately a 45-degree angle. Push the float across the joints in several directions to fill the full depth of each opening. Work in manageable sections so the grout does not begin to harden before you can clean the tile surface.
When the joints are full, turn the float to a steeper angle and pull it diagonally across the tile. This removes excess grout while leaving the joints filled. Avoid pulling the float parallel to the grout lines, since that can create low spots. Keep the tile face as clean as possible, but focus first on packing each joint completely.
Tool joints and sponge away excess grout without over-washing
Allow the grout to firm up for the time specified on the product label. Then wipe the tile with a damp, well-wrung sponge. Rinse the sponge often in clean water, and replace the water when it becomes cloudy. Use light passes rather than pressing hard into the joints.
Too much water or aggressive wiping can pull grout from the joints, create uneven color, or leave shallow areas. Hold the sponge edge nearly vertical when cleaning alongside a grout line. Once the grout has firmed up, lightly tool uneven joints with an approved grout tool or as directed by the product instructions. Epoxy and specialty grouts may require different cleanup methods, so follow the label carefully.
Remove grout haze without scratching the tile
Grout haze is a thin, cloudy film that may remain after the initial cleanup. Avoid abrasive pads, blades, and harsh chemicals, especially on polished stone, glass, or glazed tile. Start with a soft cloth and a cleaner approved for both the tile and grout.
A manufacturer-approved haze remover may be appropriate for cement-based grout. Test any cleaner in an inconspicuous location before treating the entire surface. Use gentle passes and clean water rather than vigorous scrubbing. If the haze remains, or if the tile is particularly delicate, consult a tile professional before using a stronger product. This is especially important for natural stone, which can react to acidic cleaners.
Caulk corners, edges, and changes of plane
Use grout between tiles on the same plane. At inside corners, wall-to-floor joints, countertop edges, and other changes of plane, use a flexible, mold-resistant caulk that is compatible with the surrounding materials. These areas can experience slight movement, and rigid grout may crack when surfaces shift.
Choose a caulk color that matches or complements the grout. Clean and dry the joint before applying a steady bead. Smooth it with a damp tool or finger according to the product instructions, then remove painter’s tape before the caulk begins to skin over. Allow it to cure fully before exposing the area to water. In a remodeled kitchen, coordinate the caulk color with the tile, countertop, and cabinetry for a consistent finish. Kitchens Today can help coordinate these details as part of its kitchen remodeling services.
Keep movement joints flexible instead of filling them with grout
Movement joints allow a tile installation to respond to changes in temperature, moisture, and building movement. Do not fill a designated movement joint with rigid grout. Use the flexible sealant specified for the installation instead. Rigid material can transfer stress to nearby tiles and contribute to cracks, tenting, or separated joints.
Movement joints may be needed around the room perimeter, across large floor areas, near structural breaks, or where tile meets another material. Their placement depends on the tile assembly and substrate. Review the tile manufacturer’s instructions before grouting, and consult the Tile Council of North America for industry resources related to tile assemblies and movement accommodation.
Cure grout before sealing cement-based grout or porous stone
Allow grout to cure for the time listed on the product label before sealing it or placing the surface into regular service. Cure time can vary with the grout type, temperature, humidity, ventilation, and amount of water used during cleanup. Do not rely on a general timetable if the manufacturer provides different instructions.
Cement-based grout may benefit from a compatible sealer, particularly in areas exposed to spills or moisture. Some epoxy, premixed, and specialty grouts do not require sealing. Porous surfaces such as marble, limestone, and unsealed natural stone may also need protection, but the sealer must be approved for that particular material. Test the sealer in a hidden area first, and never apply it to a damp installation.
Inspect for gaps, cracks, stains, lippage, and unfinished edges
Inspect the finished installation in good lighting after the grout and caulk have cured. Look for pinholes, gaps, cracks, low joints, stains, or areas where grout has pulled away from the tile. Check corners and edges for complete caulk coverage, and make sure trim pieces or transition strips are secure.
Run your hand carefully across the surface to identify lippage, which occurs when adjacent tiles sit at different heights. Minor variation may be unavoidable with some tile products, but noticeable height changes can indicate a setting problem. Check that grout lines remain consistent and that cut edges are covered by trim, cabinets, baseboards, or another planned finish. Address small defects before the area receives heavy use or before other remodeling work covers the edges.
How Do You Prevent Common Tile Problems?
Most tile problems begin before the first tile is installed. Crooked layouts, loose tiles, uneven grout lines, and cracked joints often result from rushed planning, an uneven substrate, poor mortar coverage, or insufficient curing time. Careful preparation and regular checks can prevent many of these issues.
Pay close attention to moisture and movement in kitchens, bathrooms, showers, and other high-use areas. Use materials designed for the application, follow the manufacturer’s instructions, and give each layer enough time to cure. The steps below can help you create a cleaner, more durable tile installation.
Correct crooked layouts with reference lines and dry-lay planning
Walls and floors are not always square, so using them as your only guide can leave the finished pattern visibly crooked. Measure the room, then snap reference lines between the center points of opposite walls. Check that the lines meet at a right angle and adjust the layout if necessary.
Before mixing mortar, dry-lay several rows of tile in both directions. Include grout joints and account for cabinets, fixtures, doorways, and transitions. This lets you identify awkward cuts before installation begins. The Daltile floor tile installation guide recommends planning the layout carefully and avoiding narrow cuts along visible walls.
Prevent weak bonds with proper coverage and clean substrates
Tile needs a clean, stable surface and sufficient mortar coverage to remain firmly attached. Remove dust, grease, wax, soap residue, loose paint, and other contaminants before installation. The substrate should be dry and free from damaged or unstable areas. Patch holes, repair suitable cracks, and level uneven sections before applying mortar or adhesive.
Choose the trowel size and setting material recommended for your tile and substrate. Comb the mortar in one direction, then press the tile into place with steady pressure. Periodically lift a tile to check coverage, particularly in wet areas and beneath large-format tile. Gaps beneath the tile can lead to hollow spots, cracked tile, and loose edges.
Avoid dried mortar, sliding tiles, uneven spacing, and lippage
Spread only as much mortar as you can cover while it remains workable. If the surface begins to skin over, remove the material and apply fresh mortar. Setting tile over dried or partially cured mortar can result in a weak bond.
Place each tile with controlled pressure instead of sliding it back and forth. Excessive movement can flatten the mortar ridges and reduce support. Use spacers to maintain consistent joints, then check the tile faces with a level or straightedge. Remove mortar from the tile surface and grout joints immediately. This large-format tile installation video demonstrates why careful placement and prompt cleanup are important.
Use leveling systems and check tile height as you work
Large-format tile can make small differences in the substrate or tile thickness more noticeable. A leveling system can help keep neighboring tiles at a similar height while the mortar cures. However, it cannot correct a seriously uneven floor or replace proper surface preparation.
As you set each section, place a straightedge across several tiles and check for raised corners, dips, and lippage. Make corrections while the mortar is still workable. Install clips and wedges according to the product directions, since overtightening can shift tiles or damage their edges. Work in manageable sections so you have time to inspect alignment before the setting material hardens.
Balance wall and floor cuts instead of leaving tiny slivers
A layout that ends with narrow strips of tile can look unfinished and may create weak, difficult-to-install pieces. Measure the final cuts before setting the first row. If one side would receive a very small piece, shift the reference line so the cuts on opposite sides are more balanced.
The cuts do not need to be identical on every side. Cabinets, plumbing, trim, and door casings may affect the pattern. Still, keeping visible cuts close to half a tile or larger usually creates a more intentional appearance. Plan wall tile around corners and changes in plane as well, since small corner pieces can be difficult to secure and align.
Clean grout joints before setting material hardens
Mortar left inside a grout joint reduces the space available for grout and can create an uneven finish. As you set each tile, use a margin trowel, spacer, or another suitable tool to remove excess mortar from the joints. Wipe mortar from the tile face before it dries, taking care not to disturb recently placed tiles.
Inspect the joints again before grouting. Hardened mortar may require careful removal with a tool that will not chip tile edges or damage waterproofing beneath the installation. Consistent joint depth helps grout pack evenly and creates a smoother, easier-to-maintain surface.
Use pH-neutral cleaners and promptly repair caulk, grout, and loose tiles
After the tile and grout have cured, clean the surface with a product suited to the material. A pH-neutral cleaner is usually a safe choice for routine care, especially for natural stone and cement-based grout. Always follow the cleaning recommendations from the tile and grout manufacturers.
Inspect the installation periodically for cracked grout, separated caulk, loose tiles, or gaps around fixtures. Flexible caulk belongs at corners, changes of plane, and other movement areas where grout can crack. Early repairs can help limit water intrusion and keep a small defect from spreading. During a larger renovation, tile work can be coordinated with Kitchens Today’s kitchen remodeling services, including cabinets, countertops, and storage solutions.
Avoid abrasive tools, harsh chemicals, excess water, and early sealing
Abrasive pads, harsh chemicals, and aggressive scraping can scratch tile, discolor grout, or damage a protective finish. Use soft cloths, nonabrasive tools, and cleaning products that match the tile type. Avoid flooding the surface with water, particularly before the grout and mortar have fully cured.
Do not rush to seal the installation. Cement-based grout and porous stone may require sealer, but the correct timing depends on the specific product and site conditions. Follow the manufacturer’s curing instructions, which may require waiting several weeks before sealing or applying polish. Proper curing helps protect the bond and reduces the risk of trapping moisture beneath the finish.
When Should You Hire a Tile Professional in Tampa Bay?
Tile installation can look simple until you encounter an uneven floor, an out-of-square wall, a difficult plumbing cut, or a waterproofing detail that must be exact. A small mistake may lead to cracked tile, loose pieces, failed grout, or moisture damage beneath the surface. Before deciding whether to handle the project yourself, consider your experience, the size of the room, the tile material, and the finish you want to achieve.
DIY installation may be practical for a small backsplash in a dry area with a stable, clean surface and straightforward cuts. Larger projects often require more preparation, specialized tools, and careful coordination with other remodeling work. Professional installation can help prevent costly rework and keep your project on schedule. TaskRabbit’s tile installation guide also recommends weighing the project’s complexity, your skill level, and the importance of long-term durability before getting started.
If tile is part of a kitchen or bathroom renovation, it should be planned alongside cabinets, countertops, flooring, storage, plumbing, and appliances. A professional can help you understand the full scope, identify potential issues early, and create a finished design with clean transitions between materials.
Choose the right scope for DIY or professional work
Begin by separating the tasks you can complete confidently from those that require specialized experience. A small backsplash with a flat wall, basic tile shape, and simple layout may be manageable if you have the right tools and enough time. Floor tile, shower walls, intricate patterns, and projects involving substrate repairs require more planning and precision.
Remember that setting tile is only one part of the work. You may need to remove existing finishes, repair the surface, create reference lines, make accurate cuts, maintain consistent joints, and allow materials to cure between stages. If the room is part of a larger renovation, an installation mistake could delay cabinets, countertops, flooring, or appliances. Hiring a professional can help maintain a consistent finish while reducing interruptions to the rest of the project.
Hire a professional for showers, waterproofing, large-format tile, and complex cuts
Some tile projects leave very little room for error. Showers and other wet areas need a properly planned waterproofing system behind the tile. Grout and caulk alone cannot protect the underlying structure from moisture. A qualified installer can address vulnerable areas around niches, benches, valves, corners, drains, and changes of plane before the tile goes in.
Large-format tile also requires a flat substrate, careful handling, adequate mortar coverage, and precise leveling. Herringbone layouts, mosaics, diagonal patterns, curved cuts, and tile around plumbing fixtures add another level of difficulty. Apollo Tile’s installer guide identifies waterproofing, challenging patterns, and problematic subfloors as situations where professional installation may be the better choice. Professional tools and experience can help reduce broken tile, uneven edges, narrow slivers, and visible alignment problems.
Coordinate tile with Kitchens Today cabinets, countertops, flooring, and storage
Tile should work with the room’s other finishes rather than compete with them. Before installation, review how it will meet cabinet sides, countertop edges, flooring transitions, baseboards, outlets, appliances, and storage features. Installation order matters as well. For example, a backsplash layout should account for the final countertop height and the placement of upper cabinets.
Working with one remodeling team can make these details easier to coordinate. Kitchens Today can plan tile alongside custom cabinets, countertop materials, storage solutions, and the broader kitchen remodeling process. This approach can help prevent mismatched heights, awkward transition lines, and last-minute changes that affect the finished design. It also gives you one place to discuss how materials, colors, textures, and practical features will work together.
Confirm installation details, material compatibility, and local requirements
Before installation begins, confirm that the tile, mortar, grout, backer board, waterproofing system, and substrate are compatible. Follow the manufacturer’s instructions for surface preparation, mortar coverage, grout-joint width, cure time, and sealing. The Ceramic Tile Education Foundation’s homeowner guide offers guidance on hiring a qualified tile installer and reviewing installation practices.
Ask who will handle surface repairs, waterproofing, transitions, debris removal, and final cleanup. You should also confirm whether the project requires permits, inspections, or approval from a homeowners association or condominium management team. Requirements can vary depending on the property and the work involved, so clarify them before demolition begins. Written project details should cover the materials, layout, schedule, warranty, preparation work, and installation responsibilities.
Request a free Kitchens Today remodeling consultation and quote
If tile is part of a larger kitchen or bathroom update, a consultation can help you make decisions before installation begins. Kitchens Today can review your goals, existing layout, preferred materials, storage needs, cabinet style, countertop options, and installation requirements. You can also discuss how tile will connect with nearby finishes and whether the existing surface needs repair or preparation.
Request a free remodeling consultation to discuss your project with the Kitchens Today team. Bring inspiration photos, room measurements, and a list of priorities to make the conversation more productive. A clear plan can help you choose appropriate tile, understand the work involved, and coordinate the installation with the rest of your remodel.
Frequently Asked Questions
What type of tile is best for a kitchen or bathroom?<br>Porcelain is a dependable choice for floors and areas exposed to frequent moisture because it is dense and durable. Ceramic works well for many backsplashes and walls, while glass and mosaic tile can add decorative detail. Natural stone offers a distinct look but may need sealing and specialized care.
Can tile be installed over an existing floor or wall?<br>Sometimes, but the existing surface must be firm, clean, dry, stable, and suitable for the selected setting material. Remove loose finishes, repair damage, correct uneven areas, and address moisture concerns first. Tile should not be used to conceal a weak or damaged substrate.
How much extra tile should I buy?<br>Order additional material to account for cuts, breakage, pattern waste, and future repairs. The amount depends on the room shape, tile size, layout, and number of fixtures or corners. Keep leftover boxes in a dry place and save the product and lot information.
How long should tile cure before grouting or regular use?<br>The required time depends on the mortar, adhesive, grout, room conditions, and tile type. Many installations need about 24 hours before grouting, while floors may require longer before heavy traffic or appliance placement. Always follow the product instructions rather than relying on a general schedule.
When should I hire a professional tile installer?<br>Professional help is wise for showers, waterproofing, large-format tile, natural stone, intricate patterns, extensive surface repairs, and projects involving plumbing or electrical openings. If the tile is part of a larger kitchen remodel, Kitchens Today can coordinate the design and installation with cabinets, countertops, storage, and other finishes. A free remodeling consultation can help clarify the scope and next steps.